Christmas can be a very special time of year but also very expensive. We thought you might enjoy some great cost saving ways to create decor and even great gifts ideas. From out door planters to crafts and treat giveaways, we chose a few favourites.

Ever see those breathtaking outdoor planters and then look at the price tag. You can actually create these masterpieces yourself at a fraction of the cost. It seems daunting but really with just a little effort, some simple steps and a few items from the hardware store or craft store, you can do it.
There are a few options from big to small so you can decide what you'd like to tackle to give your new home character without breaking the bank.
Let's make a list of the items before we get started.
Outdoor Planter Tools & Materials
Greenery and decorations will be dependant on the size of your planter.
To get started, ensure you have the following items on hand before you begin:
- Container of choice such an old wood box, metal pot or plastic summer pot ( could be anything)
- Floral foam or oasis from any craft store or hardware store
- Wire and snipers for larger arrangements
- Conifer, evergreen, juniper greenery ( imitation or real ) from your local hardware, grocery or craftstore
- Glass mason jars ( for candles ) or mini lights ( solar or battery )
- Pine cones, birch branches, berries, Christmas balls, ribbons of your choice
- Any other decorations you might have like a mini wooden sleigh, bells or floral picks
- Spray snow if desired
- Small wooden stakes like the floral ones - you can find them at craft & hardware stores
- Your wood finish of choice
- Gloves - it can get prickly sometimes when working with conifers!
- Latex gloves
Time to assemble your containers!
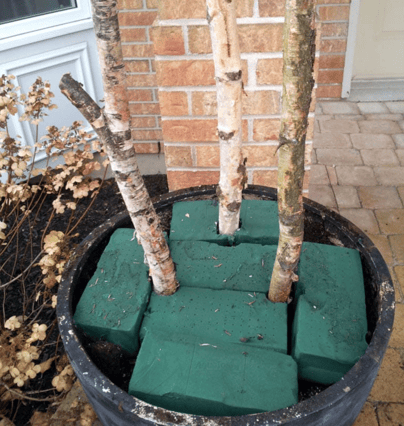
Now that you’re all set to go, you’ll need to start by filling your container with the floral foam and you might some regular foam under if it's really deep. I have used old empty plastic pots turned upside down or 2 litre pop containers to help fill it. If your arrangement is real then pre soak your floral foam.
Start adding greenery
Use the flat or large items at the bottom and build your way up. For instance, place the juniper next after any birch branches, then pine or other conifer sprays.
Use tall conifers sprays up behind your branches too to show off the birch.
You can build it up from there by adding branches. For items that are more delicate or break easy, take some of your wire and wrap it around your item and then around one of the mini floral stakes. Then push that into your container.
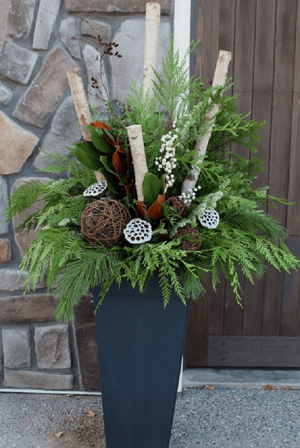
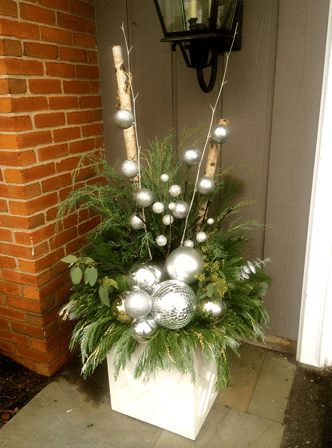
For the finishing touches you can add bells, balls, floral picks, berries, bows or whatever.
Pro Tip: Stagger decoration items in the foreground as well as partially into the back ground. Make sure to lightly spray the fake snow so it kisses all your items but don't cake it on as it will take away from the design and not show your colours.
For more great ideas go to a piece of the rainbow as this is where we found these!
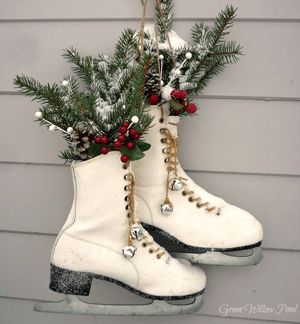
Depending on the look, it's really up to you what you add and what container appeals to you. Get creative and try and old metal bucket or maybe hang some old skates like these from Green Willow Pond and fill it with sprays and add some ribbon. You never know what you'll find. 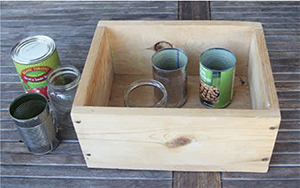
Candles in frosty jars?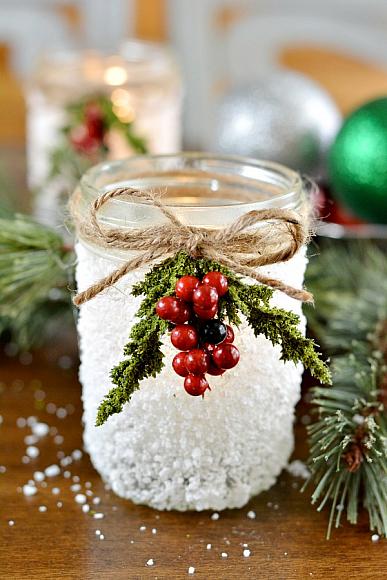
Here is a super simple yet effective way to add a beautiful ambience or great gift to that favourite office friend.
Items needed:
- mason jars or any recycled glass jars
hemp twine or jute twine - Foam brush
- Epsom Salt or Coarse salt
- mod podge or Decou-Page
- To light them up at night, you can use battery powered LED fairy string lights or real white votive candles
- Hot glue gun and glue
- Christmas picks
Basically begin by covering the jar with decoupage glue. Cover the entire jar with epsom salt. This will make the jar appear like it's covered in snow. It also looks beautiful when a candle is lit. Finally tie twine around the mouth of the jar and hot glue mixed berries and picks. Place your votive candle or fairy lights in and enjoy.
For video version, see 5 Minute DIY frosted Mason Jar or step by step at DecoArt.
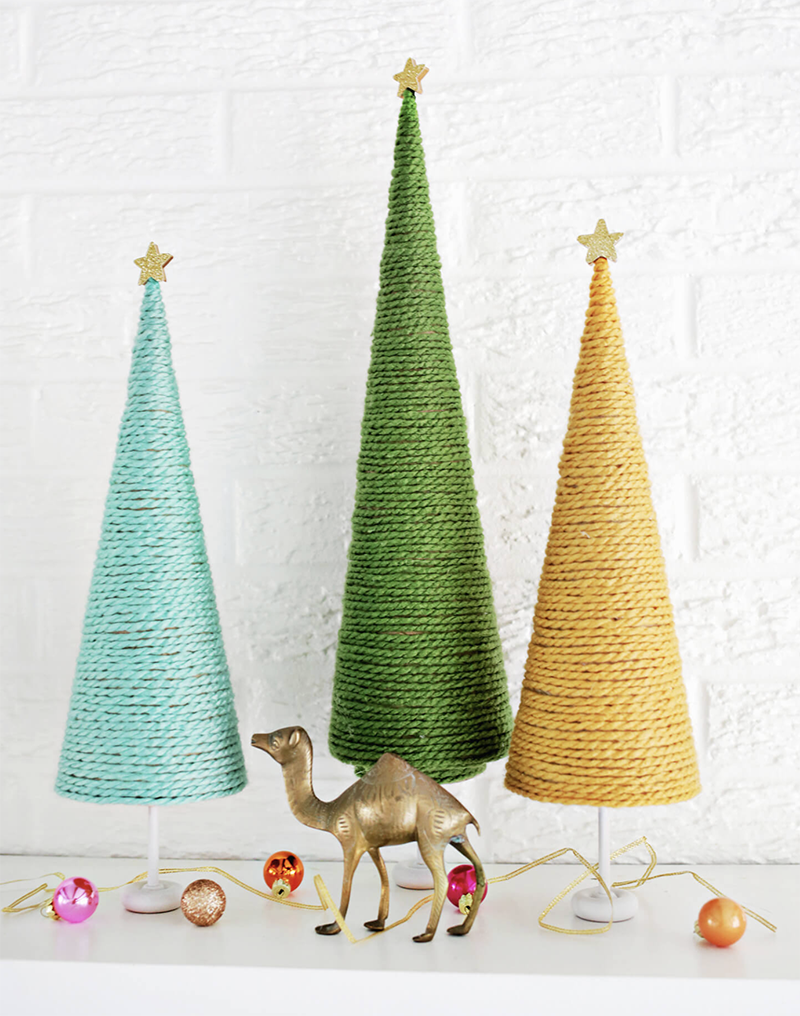
Colour coordinated trees?
Here is an easy and fun little project to do that you can vary with yarn or glitter yarn. I think you could also cover the cardboard cone with glue and glitter too!
- Supplies:
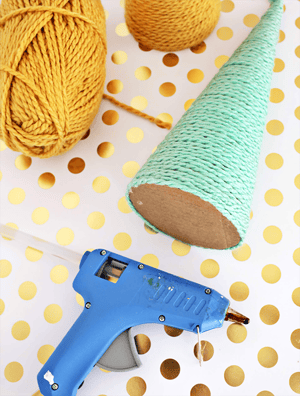
- yarn in as many colours as you’d like
- cardboard or styrofoam cones (check your local craft store)
- wooden toy wheels in a large and small size
- dowel rod that will fit the hole of the wooden wheels
- small wooden stars
- white and gold paint
- gold glitter paper
- scrap piece of cardboard
- hot glue gun & glue sticks
Take your hot glue gun and glue the start of your yarn all the way around the bottom of your cone. Keep gluing the yarn around and around as close to the previous layer as you can until you have filled the cone to the top with yarn. A high temperature glue gun works best for this project.
Yarn Christmas Tree DIY has all the steps.
 If using a hollow cone that doesn’t have a bottom, once your cone is full of yarn, trace the bottom of the cone onto a scrap piece of cardboard and cut out the circle. Glue the circle onto the bottom of your cone so you have a platform to attach your tree base to. Or alternatively, you can have them not raised so they sit directly on your surface which will eliminate the next step.
Cut your dowel rod into 2-3” sections (you’ll probably want a small saw or hacksaw to cut these) and slide a small wheel on one side and a larger wheel on the other side. You can glue these together if you like, but they usually fit pretty snugly even without glue.
Paint the tree bases white and let dry. Glue the base to the center of the bottom side of each cone.
Paint your small wooden stars gold or spray them with gold glittery spray paint.